
Carry-On Only Travel: What It Takes to Pack Light for Any Trip
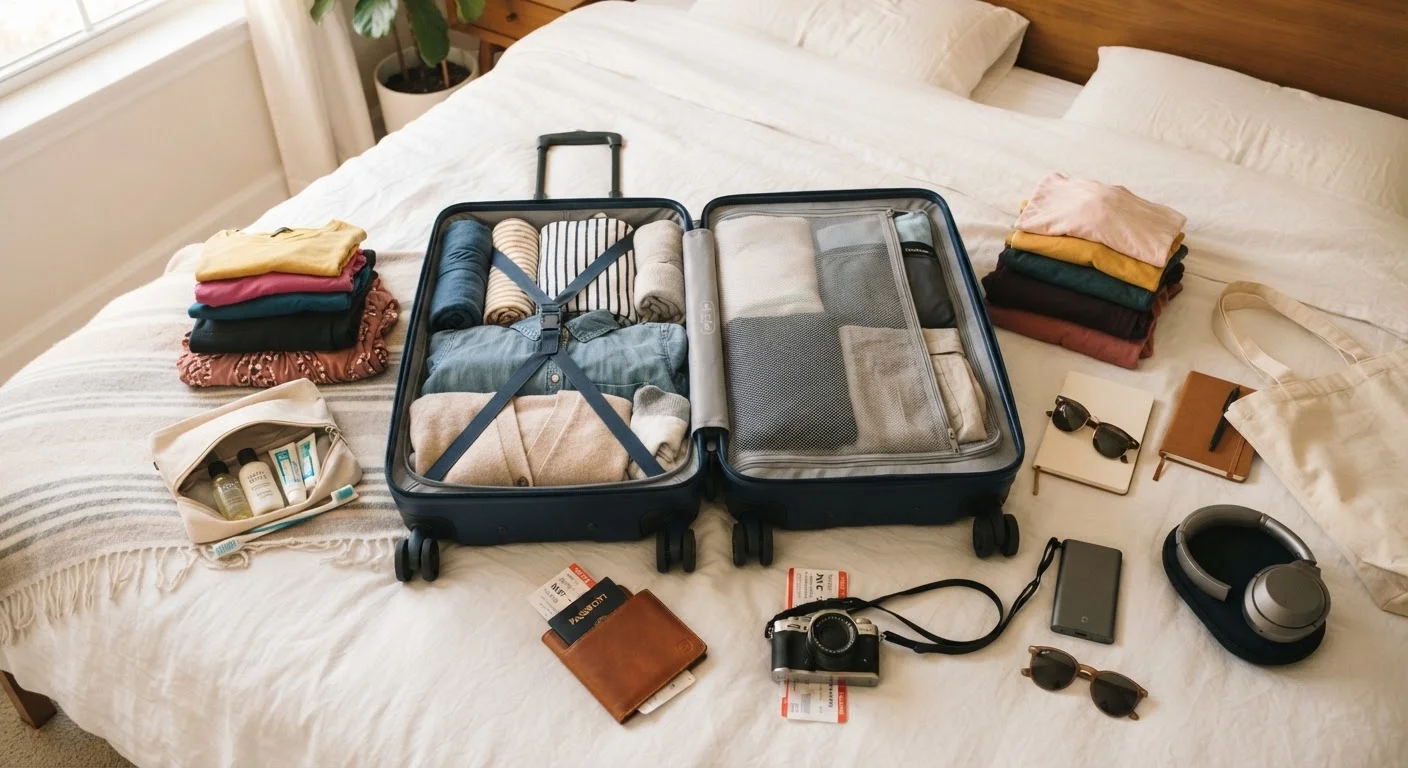
Photo credit: FaqInsider.com
In this article
Skipping checked baggage cuts costs and saves time. Here's how experienced light packers approach clothing, gear, and toiletries for trips of any length.
Key Takeaways
- Carry-on-only travel eliminates checked bag fees and saves significant time at airports.
- A versatile, neutral-toned wardrobe built around layering covers most trip scenarios.
- Toiletries and liquids must comply with TSA's 3-1-1 rule for carry-on bags.
- Rolling clothes and using packing cubes dramatically increases usable bag space.
- Most items you think you'll need can safely be left at home without consequence.
- Even week-long trips are achievable with a single carry-on when planned strategically.
Why Carry-On Only Changes How You Travel
Skipping checked baggage isn't just about saving a fee - though the savings are real and can add up quickly on multi-leg itineraries. Traveling with only a carry-on means you walk off the plane and head directly to your destination. No waiting at the carousel. No filing a lost-luggage report. No planning your schedule around bag drop-off times. It's a fundamentally lighter way to move through airports and cities.
Carry-on-only travel also builds a more intentional approach to trips in general. Packing constraints force decisions that overpacked bags avoid - and those decisions often lead to better experiences. When you're not hauling heavy bags across cobblestones, you're more willing to walk an extra neighborhood, hop a last-minute train, or change your plans without logistical penalty. For travelers focused on controlling travel costs, skipping checked fees is one of the most straightforward wins available.
The good news: a well-planned carry-on really can handle any trip length. Weekend getaways are obvious, but seasoned light packers regularly manage two-week international trips in a single bag. The method is learnable - and the steps below walk you through it from choosing your bag to doing your final edit.
What you will need
What You'll Need Before You Start Packing
Getting the gear and ground rules right before you start loading your bag makes every subsequent decision easier. Confirm your airline's carry-on dimensions and weight caps before shopping for luggage or packing anything - these rules shape every choice that follows. Most full-size U.S. carriers allow bags around 22 x 14 x 9 inches for overhead bins, but regional jets and budget carriers sometimes enforce tighter limits.
Carry-On Luggage
Your primary bag - choose one that fits within your airline's overhead bin dimensions and weight limits.
Personal Item Bag
A small backpack or tote that fits under the seat in front of you, used for electronics, documents, and daily essentials.
Packing Cubes
Fabric organizers that compress clothing and separate categories, making a full bag much easier to navigate.
TSA-Compliant Toiletry Bag
A clear, quart-sized zip bag required to hold all liquid and gel containers through airport security.
Reusable Travel Bottles
Refillable containers for shampoo, conditioner, and other liquids - avoids relying on expensive hotel products.
Packing List (printed or digital)
A written list prevents last-minute overpacking by holding you accountable to your planned item count.
Once you have your bag and supplies ready, review your itinerary for activity-specific requirements. Hiking gear, formal event attire, or beach equipment each demand specific solutions. In many cases, renting gear at your destination (skis, snorkel sets, bikes) or packing multi-use items is more practical than trying to fit everything in one bag. Check out our trip-planning habits guide for a broader framework on making these kinds of decisions before departure.
How to Follow the Steps and What to Expect
The six steps below move from pre-packing research through your final ruthless edit. Work through them in order rather than jumping straight to folding clothes - the structural decisions (bag size, clothing palette, toiletry strategy) shape what's possible downstream.
Confirm your airline's carry-on size and weight rules
Before touching a single item of clothing, look up the exact carry-on allowance for every airline on your itinerary - especially if you're connecting on a regional carrier. Dimensions and weight limits vary considerably, and a bag that clears one airline may be gate-checked on another. Write down the most restrictive policy and use that as your standard.
Build a versatile capsule wardrobe
Choose clothing in two or three neutral colors that layer and mix easily. Aim for items that can serve double duty: a button-down that works for a day of sightseeing and a casual dinner, or leggings that function for hiking and relaxing. A general framework for a 7-day trip might be: 5 tops, 2-3 bottoms, 1 dress or versatile layer, underwear and socks for each day, 1 pair of comfortable walking shoes, and 1 lighter shoe option.
Check your destination's climate and planned activities before finalizing. Cold-weather trips require strategic layering rather than bulky single-purpose items - a merino wool base layer, a mid-layer fleece, and a packable outer shell can handle a wide temperature range.
Pack and organize your clothing efficiently
Rolling clothes instead of folding them reduces wrinkles and saves space. Packing cubes further compress clothing and keep categories separated so you're not unpacking the entire bag to find a shirt. Place heavier items like shoes near the wheels of a hard-shell bag to maintain balance, and stuff socks inside shoes to use every centimeter of space.
Assemble a TSA-compliant toiletry kit
Under TSA's 3-1-1 rule, all liquids, gels, and aerosols must be in containers of 3.4 oz (100 ml) or smaller, all fitting in one clear, quart-sized zip bag per traveler. Fill reusable travel bottles with your preferred products rather than buying miniatures each trip. Many toiletry items - toothbrushes, deodorant sticks, solid shampoo bars - don't count as liquids and can travel without restriction. Research your destination: if you'll have easy access to a pharmacy, consider buying certain items on arrival rather than packing them.
Manage electronics and documents in your personal item
Keep your passport, boarding passes, and any essential documents in your personal item - never in checked luggage (which you don't have) or loose in your bag's outer pocket. Carry a universal power adapter, a portable power bank, any necessary charging cables, and your phone and laptop in this bag as well. Headphones, a travel pillow, and any medications you need during the flight should also live here, not in the overhead bin.
Do a final edit before zipping up
Once everything is packed, pull it all out and cut at least two items. It's a reliable exercise: nearly every packer finds something they wouldn't actually miss. Ask yourself whether each item is truly necessary or just comforting to have nearby. If you're unsure, leave it out - most things can be purchased or borrowed at your destination if you genuinely need them.
Once your bag is packed and zipped, run through the pre-departure checklist to make sure documents, health items, and logistics are squared away beyond just the packing itself. Packing light is one piece of a smooth departure - cross-referencing a full checklist catches the things your bag strategy can't address.
First-time carry-on-only travelers often discover that the hardest part isn't physical space - it's psychological comfort. Overpacking is usually driven by the fear of not having something, not by genuine need. With each trip, your packing list gets shorter, your confidence grows, and the whole process becomes faster. Most committed light packers report that within two or three trips, they find it difficult to go back to checked luggage at all.

Author
Travel Editorial Team
Travel Editorial Team is the collective byline for our editorial team and contributor network. Articles published under this byline or an editorial pen name are researched, written, and reviewed according to our editorial standards for clarity, consistency, and independence before publication.
View all articles →