
Planning a Bathroom Remodel: Scope, Sequence, and Trade Coordination
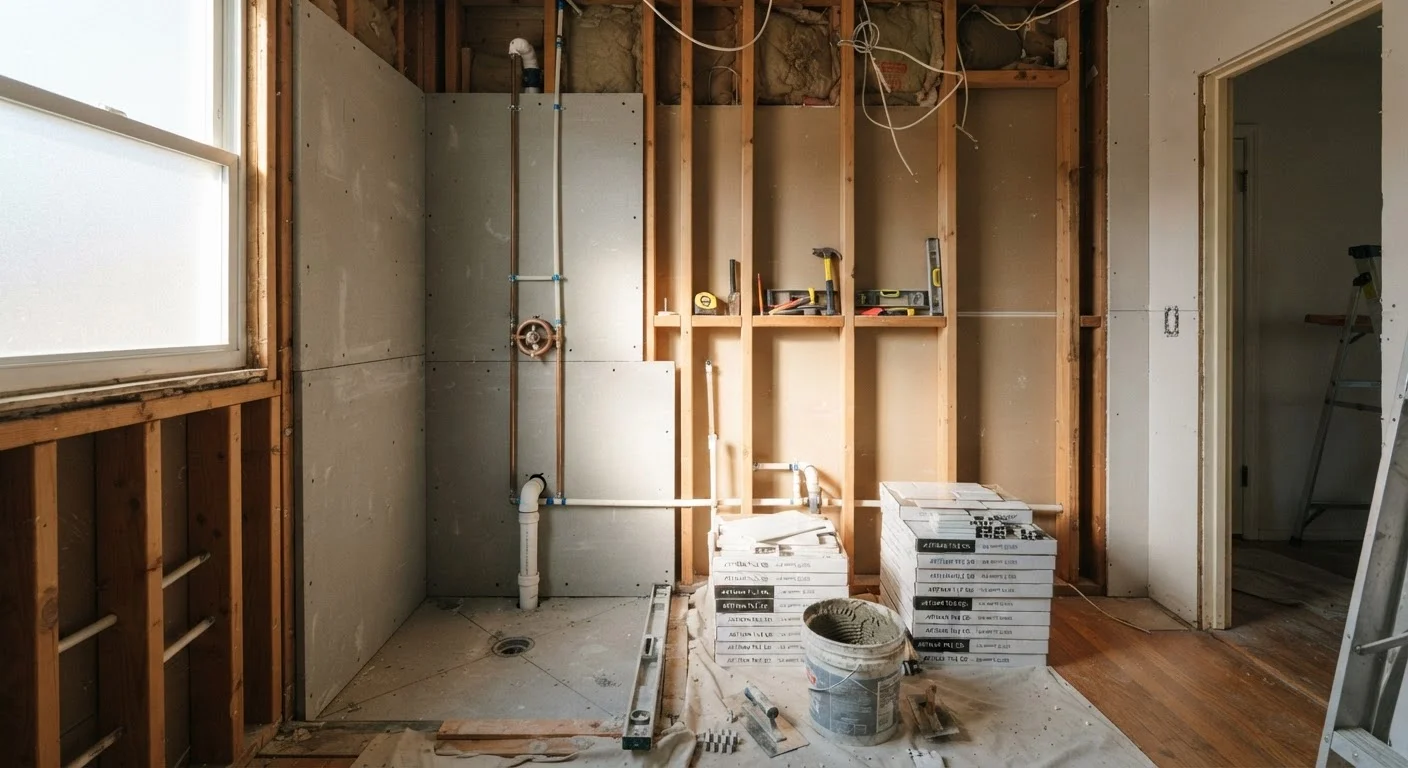
Photo credit: FaqInsider.com
In this article
A comprehensive guide to planning a bathroom renovation from layout decisions and permits to plumbing, tile, and finishing work in the right order.
Key Takeaways
- Scope clarity before demolition prevents expensive mid-project changes to plumbing and layout.
- Most bathroom remodels involving plumbing, electrical, or structural changes require permits.
- Trades must follow a strict sequence - rough-in work always precedes walls and tile.
- Coordinating contractor schedules in advance reduces costly delays between phases.
- Moving plumbing drain lines is one of the most expensive decisions in any bathroom remodel.
Define Your Scope Before Anything Else
The single biggest driver of bathroom remodel overruns isn't labor or materials - it's scope that wasn't clearly defined before work began. Before you contact a single contractor, decide what you're actually changing. Are you refreshing surfaces (tile, vanity, fixtures) within the existing footprint? Reconfiguring the layout? Adding square footage? Each of those is a fundamentally different project with different costs, timelines, and trade requirements.
Start by mapping your current bathroom as-is: where is the toilet flange, the drain, the supply lines, and the vent stack? These elements anchor your layout. Moving a toilet or shower drain means relocating the drain line, which typically requires opening the subfloor and possibly the ceiling below - a significant cost multiplier. Common planning assumptions that derail bathroom remodels explains how underestimating this one decision trips up many renovations.
Write a simple scope statement before any quotes are requested: list every element being removed, every element being replaced, and every element staying in place. This document becomes the baseline against which bids, contracts, and change orders are measured.
Before finalizing your layout, photograph and sketch the location of every existing pipe and junction box once demolition exposes the walls - these photos save significant time when coordinating trades later.
Rough-in locations are often not where you'd expect them, and having a visual record prevents miscommunication between plumbers, electricians, and tile setters who may not all be on-site at the same time.
Order tile and fixtures at least two to three weeks before you need them, and verify that every item is in stock before scheduling your tile installer.
Back-ordered materials are one of the most common reasons bathroom remodels stall mid-project, leaving a room unusable for weeks while contractors wait.
Permits, Codes, and When You Need a Licensed Pro
In most U.S. jurisdictions, a bathroom remodel that touches plumbing, electrical wiring, or structural elements requires one or more permits. This isn't bureaucratic overhead - it's the mechanism that ensures your home meets safety codes and that your homeowner's insurance remains valid if something goes wrong later.
Typical permit triggers include: moving or adding any plumbing drain or supply line, adding or relocating electrical circuits or outlets, installing a new ventilation fan ducted to the exterior, or making changes to load-bearing walls. Cosmetic replacements - swapping a vanity for one of the same size, retiling over existing substrate, or replacing a toilet in its existing location - often don't require a permit, but requirements vary by municipality. Always verify with your local building department rather than assuming.
Permits Protect You - Not Just the Inspector
Unpermitted work discovered during a home sale can delay or derail the transaction, require costly remediation, or void portions of your homeowner's insurance claim in the event of a loss. The permit process is designed to verify that work is safe and code-compliant, which ultimately protects your investment and your household.
Licensed plumbers and electricians are required by law for permitted work in most states. Attempting to self-perform permitted work without the correct license can result in failed inspections, required demolition to expose hidden work, and complications when selling your home. See key questions to ask before any major renovation begins for a contractor-vetting checklist.
The Right Sequence: How Trades Build on Each Other
Trade sequencing is where bathroom projects most commonly go wrong. Each phase creates the conditions the next phase depends on - getting the order wrong means tearing out completed work.
- Demolition: Remove existing finishes, fixtures, and any walls being altered. This exposes the substrate and existing rough-in locations.
- Structural and framing: Any wall modifications, niche framing, or blocking for grab bars and heavy fixtures happen now, before utilities are run.
- Rough-in plumbing: The plumber sets new drain lines, supply lines, and shower valve bodies in the wall - all before any wall covering goes up.
- Rough-in electrical: The electrician runs new circuits, places junction boxes, and rough-wires the ventilation fan. This typically happens alongside or just after rough plumbing.
- Inspection: Rough-in inspections must pass before walls are closed. Never skip this step.
- Waterproofing and substrate: Cement board (or an equivalent tile backer) is installed and seams are taped. Wet areas receive a waterproofing membrane before any tile is set.
- Tile: Floor tile is typically set before wall tile; shower walls are tiled before the shower floor to ensure proper overlap of waterproofing layers.
- Finish plumbing and electrical: Faucets, showerheads, toilets, vanity lights, and exhaust fans are installed after tile is complete and grout has cured.
- Painting and trim: Paint before final fixture installation where possible to avoid masking complexity.
For a broader look at how this sequencing fits into whole-home projects, see this comprehensive renovation guide.
Coordinating Contractors Without the Chaos
Most bathroom remodels involve at least three trades: a plumber, an electrician, and a tile installer or general contractor. Getting them to show up in the right order - and to schedule around each other's inspection windows - requires active coordination from you or a general contractor acting as project manager.
Build a simple project calendar before work begins. Identify which phases overlap (framing and rough-in plumbing often run concurrently) and which are strictly sequential (tile cannot begin until waterproofing is complete and inspected). Share this calendar with every trade so each knows when their window opens and how long it is.
Write Everything Down
Every scope change, schedule adjustment, and verbal agreement should be confirmed in writing - a simple email following a phone conversation is sufficient. This creates a clear record if disputes arise and helps all parties stay aligned as the project evolves.
Establish clear communication expectations upfront: who is the single point of contact, how will schedule changes be communicated, and what is the process for approving changes to scope. Document every change in writing. Renovation planning priorities covers how written documentation protects your budget as much as your timeline.
Finishing Work: Tile, Fixtures, and Final Details
Finishing work is where your bathroom becomes visible - and where patience pays off. Rushing tile before waterproofing has fully cured, or setting fixtures before grout has hardened, creates problems that are expensive to undo.
When selecting tile, consider the coefficient of friction for floor surfaces (a higher rating indicates better slip resistance, particularly relevant for wet areas). Large-format tiles on small floors can create awkward cuts; a tile layout drawing before ordering helps you visualize the pattern and minimize waste.
Fixture installation is largely a finish plumbing task, but make sure rough-in dimensions were specified correctly before tile went up. A showerhead rough-in at the wrong height or a tub spout in the wrong position cannot be easily adjusted once tile surrounds it.
Final punch-list items - caulking at all tile-to-fixture transitions, adjusting door hardware, testing the exhaust fan for proper exterior venting, and confirming the GFCI outlets are functioning - should be walked through systematically before closing out the project. These small details determine whether the space feels finished or unfinished, and catching them while trades are still available is far easier than scheduling a callback.
This article is for general informational purposes only. Permit requirements, code specifications, and licensing rules vary by location. Always consult your local building authority and licensed professionals before beginning renovation work.

Author
Home & Garden Editorial Team
Home & Garden Editorial Team is the collective byline for our editorial team and contributor network. Articles published under this byline or an editorial pen name are researched, written, and reviewed according to our editorial standards for clarity, consistency, and independence before publication.
View all articles →