
Why Caulking Around Windows Actually Matters More Than Most People Think
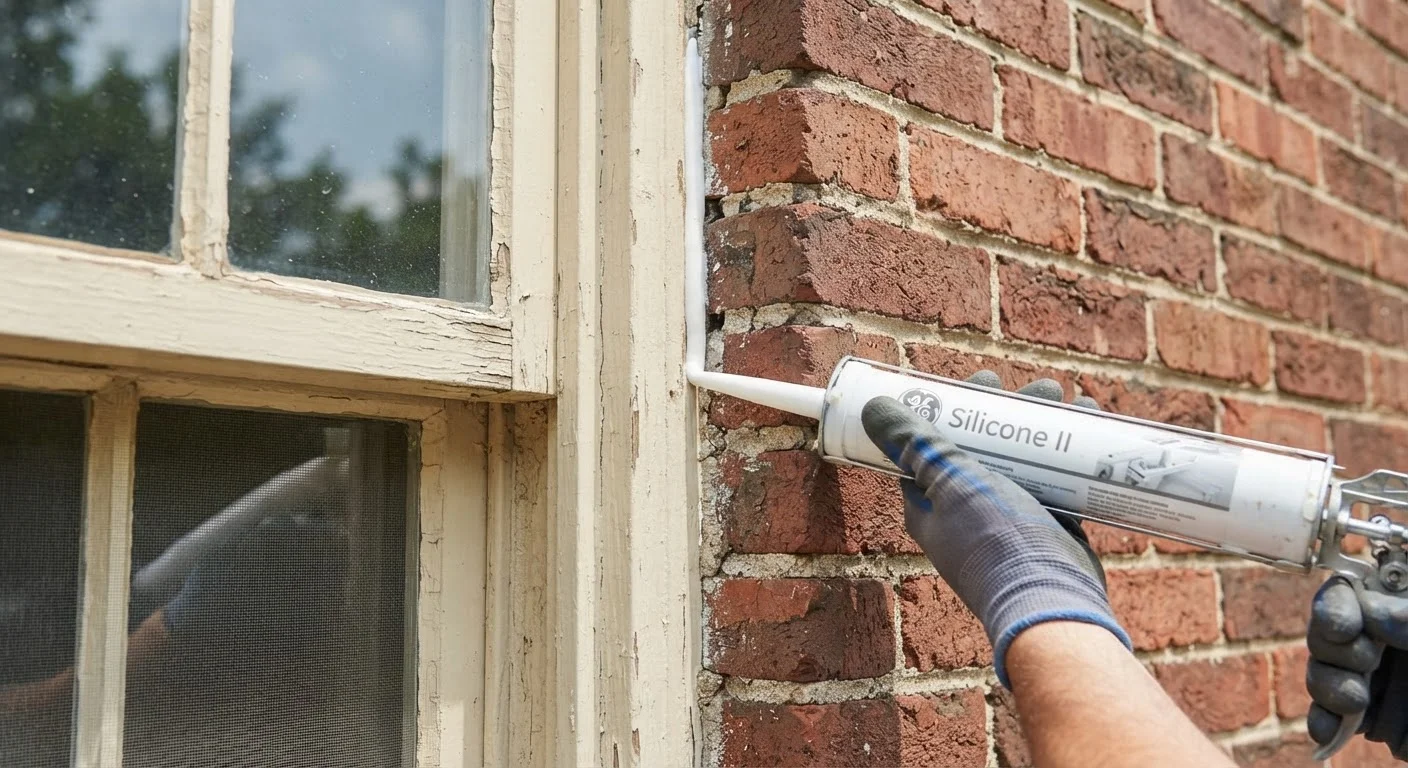
Photo credit: FaqInsider.com
In this article
Failed window caulk is one of the most overlooked sources of drafts, water damage, and rising energy bills. Here's what to look for and how to reseal properly.
Key Takeaways
- Failed window caulk is a leading cause of drafts, moisture intrusion, and elevated heating and cooling costs.
- Exterior caulk typically lasts 5-10 years before cracking, shrinking, or pulling away from the frame.
- Old caulk must be fully removed before a new bead will adhere properly and create a lasting seal.
- Paintable latex caulk suits most interior trim joints; silicone or siliconized latex works better on exterior surfaces.
- Inspect window caulk annually - small gaps caught early are far cheaper to fix than water-damaged framing.
Why Window Caulk Fails - and What It Costs When It Does
Window caulk is designed to bridge the gap between two different materials - typically a window frame and the surrounding wall or trim - that expand and contract at different rates with temperature swings. Over time, that constant movement causes even a properly applied bead to crack, shrink, or pull away from one surface. Most exterior caulk has a realistic service life of roughly five to ten years, though harsh climates can shorten that significantly.
When the seal breaks down, the effects compound quickly. Air infiltration through window gaps is a well-documented contributor to heating and cooling losses in homes. Moisture intrusion is the more serious concern: water that enters a wall cavity through a failed joint can saturate insulation, promote mold, and begin rotting framing - all without any visible sign until damage is well advanced. As our home warning signs guide explains, small structural clues caught early are far less costly to address than the problems they eventually become.
Water Damage Behind Walls Is Expensive
A compromised window seal does more than let in cold air - it allows moisture to penetrate wall cavities, where it can silently rot framing, feed mold growth, and damage insulation over months or years. Because the damage is hidden, it is often not discovered until it becomes a major repair. Catching failed caulk early is one of the most cost-effective preventive measures you can take as a homeowner.
Understanding whether your problem is a caulking issue or a gap that needs a different solution entirely is also worth knowing before you start. See our guide on caulk versus weatherstripping to confirm you're using the right approach for each specific gap.
What You'll Need Before You Start
Recaulking windows is a genuinely beginner-friendly task - the tools are simple, widely available, and reusable across many future home projects. The most important investment is in your preparation: removing old caulk completely and cleaning the joint properly accounts for the majority of how long a new bead will last.
What you will need
Caulk gun
Dispenses caulk from a tube in a controlled, even bead along the joint.
Utility knife or oscillating multi-tool
Cuts and lifts old caulk from the joint cleanly without damaging the surrounding surface.
Caulk removal tool or stiff plastic scraper
Pulls away loosened caulk residue without gouging wood or vinyl frames.
Isopropyl alcohol or denatured alcohol
Cleans the joint surface after old caulk is removed, ensuring strong adhesion for the new bead.
Painter's tape
Masks the frame and siding on either side of the joint for a clean, straight caulk line.
Caulk finishing tool or gloved finger
Smooths and presses the fresh bead into the joint for full contact and a neat appearance.
If you're uncertain whether a gap calls for caulk or weatherstripping, the guide to choosing the right seal can help clarify the distinction before you purchase materials.
Step-by-Step: How to Reseal Your Windows
Don't Caulk Over Old, Failing Caulk
Applying fresh caulk directly over a cracked or peeling bead is one of the most common mistakes homeowners make. The new layer bonds to the failed material rather than the substrate, so it will fail just as quickly - sometimes within a single season. Always remove the old caulk completely before applying a fresh bead.
Inspect every window for caulk failure
Walk the interior and exterior of your home and examine the joint where each window frame meets the surrounding wall or trim. Look for cracks, gaps, shrinkage, discoloration, soft or spongy texture, and sections where the caulk has pulled away from either surface. On the interior, check for cold drafts near the trim and any paint bubbling that might suggest moisture. Take notes or photos so you can prioritize which windows need attention first.
Choose the right caulk for the location
Not all caulk performs equally in all conditions. For exterior window joints, look for a siliconized latex or 100% silicone product rated for outdoor use - these flex with seasonal temperature changes and resist UV degradation better than basic latex. For interior trim joints where you'll need to paint over the finished bead, a paintable acrylic latex caulk is generally appropriate. Always read the product label to confirm it is suitable for the substrate you're working with (wood, vinyl, brick, or stucco).
Remove all old caulk completely
Score along both edges of the old caulk bead with a utility knife, then use a caulk removal tool or stiff plastic scraper to lift it out in strips. Work slowly to avoid gouging wood trim or scratching vinyl. For stubborn residue, a caulk remover solvent - applied per its label directions - can soften the material for easier removal. Take your time here; this step directly determines how well the new bead adheres.
Clean and dry the joint surface
Wipe the entire joint with isopropyl alcohol on a clean rag to remove dust, oils, and any caulk residue. Allow the surface to dry fully before proceeding - moisture trapped beneath fresh caulk is one of the leading causes of premature adhesion failure. If the wood shows any signs of existing rot or mold, address those issues before sealing the joint.
Apply the fresh caulk bead
Cut the caulk tube nozzle at a 45-degree angle, sizing the opening to match the width of your joint - smaller is better; you can always apply a second pass if needed. Apply painter's tape on both sides of the joint if you want clean, crisp lines. Hold the caulk gun at a consistent angle and move at a steady pace, maintaining light, even trigger pressure. Aim to fill the joint completely without excess buildup on either side.
Smooth and finish the bead
Within a minute or two of applying the bead - before a skin forms - run a damp fingertip or a caulk finishing tool along the joint with light, steady pressure. This presses the caulk firmly against both surfaces and creates a concave profile that sheds water effectively. If you used painter's tape, remove it at a 45-degree angle immediately after smoothing, before the caulk begins to set.
Allow the caulk to cure fully before exposing it to moisture
Cure times vary by product type and ambient conditions - check the label, but most exterior caulks require at least 24 hours before rain exposure, and several days for a full structural cure. Avoid touching or painting the bead during this window. Once cured, inspect the joint again to confirm full coverage; apply a second thin bead to any gaps or voids you notice.
Apply Caulk in Mild, Dry Conditions
Most caulks cure best between 40°F and 80°F with low humidity. Applying on a cold or damp day can prevent proper adhesion and slow cure time significantly. Check the product label for its specific temperature and moisture requirements before you start.
Keeping the Seal in Good Shape Long-Term
The easiest way to manage window caulk is to inspect it every fall before heating season begins. A quick visual pass around each window takes only a few minutes and gives you the chance to catch small separations before they become entry points for water. Pay particular attention to the bottom corners of each window, where water pools and caulk tends to fail first.
While you're conducting this annual check, it's also worth evaluating the broader energy envelope of your home. Window seals are one piece of a larger system - the relationship between attic insulation and ventilation is another factor that significantly affects how efficiently your home retains conditioned air. Note that caulk is a window-frame solution; it is not the right material for tile joints in wet areas - see our guide on grout and caulk in tiled bathrooms if that question comes up in a bathroom or kitchen project.
With a bit of annual attention, properly applied window caulk can be one of the simplest and most cost-effective maintenance tasks you maintain on your home.

Author
Home & Garden Editorial Team
Home & Garden Editorial Team is the collective byline for our editorial team and contributor network. Articles published under this byline or an editorial pen name are researched, written, and reviewed according to our editorial standards for clarity, consistency, and independence before publication.
View all articles →